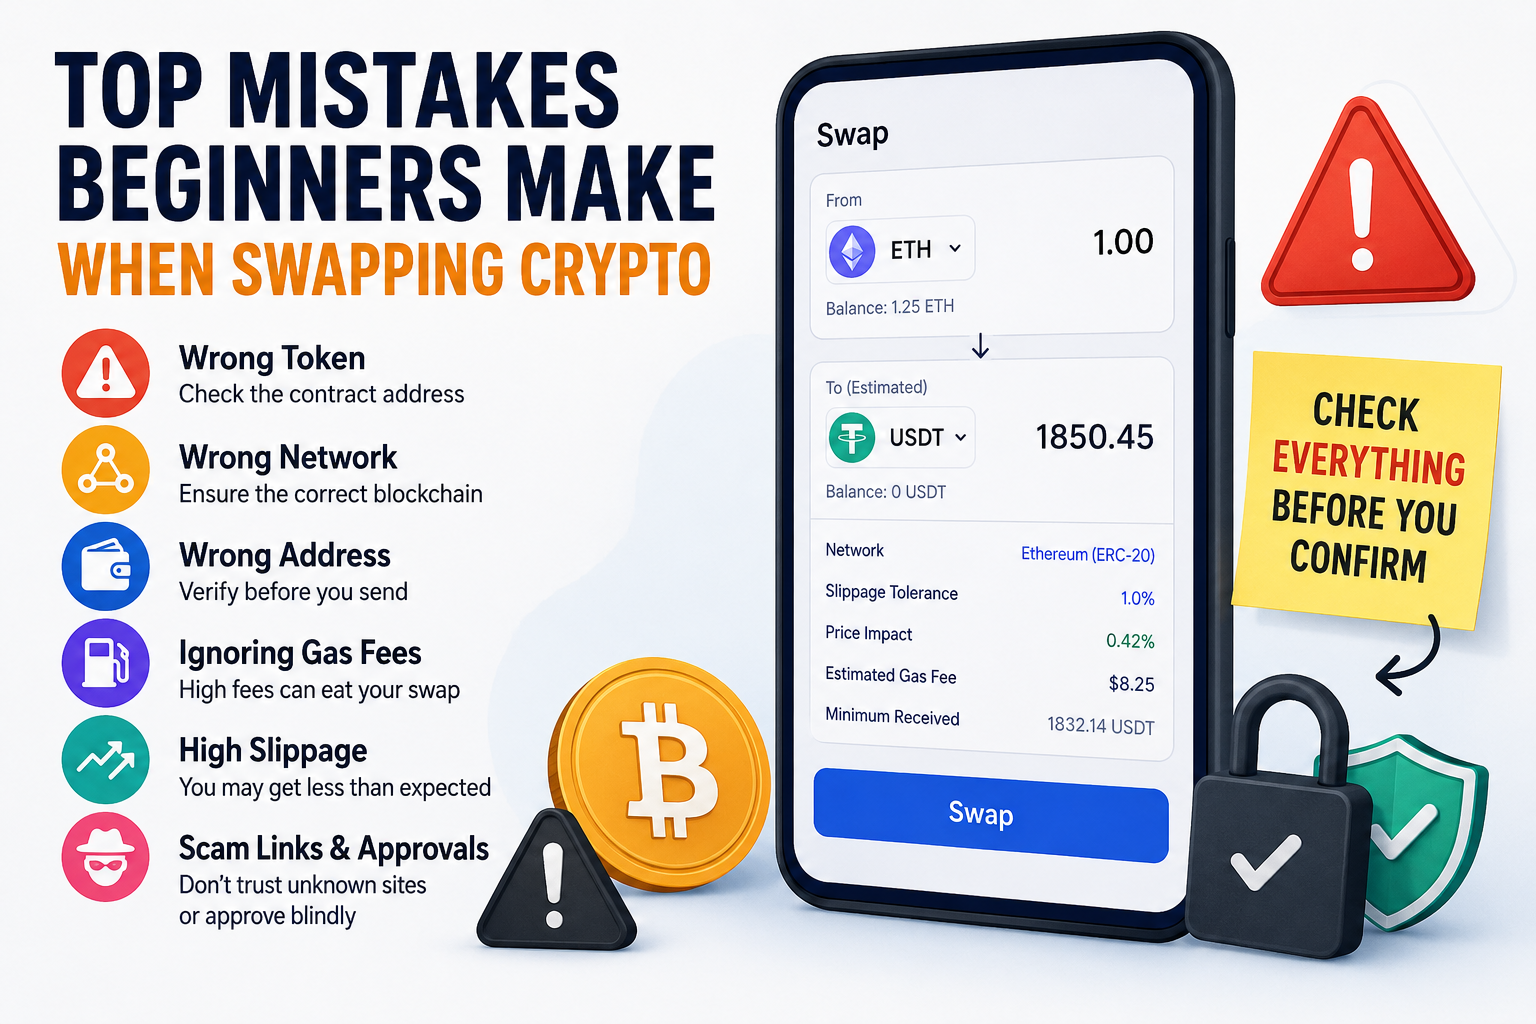
The biggest mistakes beginners make when swapping crypto are choosing the wrong token, using the wrong network, ignoring fees, trusting fake links, and approving wallet permissions without reading them. As a crypto enthusiast, I think most swap mistakes happen because people rush the final confirmation screen. That one screen usually shows the token, network, fee, approval request, and estimated amount received, so skipping it can turn a simple swap into an expensive lesson.
Swapping the Wrong Token
1 Confusing Tokens With Similar Names
Many beginners search for a coin by name and click the first result. That can be risky because scammers often create tokens with names that look close to popular coins.
For example, a fake token can copy the name, logo, and ticker of a real project. The token may look familiar inside a wallet or swap app, yet the contract address can be completely different. I always check the contract address before swapping into a token I have not used before, especially with new meme coins or trending coins.
2 Trusting the Logo Instead of the Contract Address
A token logo does not prove that the token is real. Anyone can make a token with a familiar name and image.
The safer habit is simple: copy the contract address from the project’s official website or a trusted token listing page, then compare it inside the swap app. Beginners often skip this because the app feels familiar. That is where the mistake starts.
3 Buying a Token Just Because It Is Trending
A trending token can move fast, and that pressure makes people click too quickly. Some tokens become popular for a real reason, while others trend because bots, influencers, or scam groups push them.
Before swapping, I like to ask one clear question: can I verify this token from more than one trusted source? When the answer is no, I step back.
2. Using the Wrong Blockchain Network
1 Sending or Swapping on the Wrong Chain
One of the most painful beginner mistakes is using the wrong network. A token can exist on Ethereum, BNB Chain, Polygon, Base, Arbitrum, and other chains, and those versions are not always interchangeable.
For example, USDC on one network may not arrive correctly if the receiving wallet only supports another network. Some services can recover certain assets, yet recovery is limited and not guaranteed. Beginners should treat the network choice as seriously as the wallet address.
2 Assuming All Wallets Support All Networks
A wallet address can look the same across several EVM networks, which creates confusion. The address may be valid, yet the receiving platform may not support the chain you used.
That is why I check the receive screen first. If the exchange or wallet says “deposit only on Ethereum,” I do not send through Polygon or Base just because the fee looks cheaper.
3 Choosing Cheap Fees Without Checking Compatibility
Lower network fees feel attractive, especially when swapping small amounts. Still, cheap fees do not help if the token goes to a network the receiving side cannot handle.
My rule is simple: compatibility first, fee second. Saving a few dollars on fees makes no sense when the whole transfer becomes difficult or impossible to recover.
Copying the Wrong Wallet Address
1 Checking Only the First Few Characters
Many beginners check only the first four or six characters of a wallet address. That habit can fail because scam addresses may look similar at the beginning or end.
A better habit is to compare the first characters, middle section, and last characters. For larger swaps, I prefer copying the address from a saved contact or scanning a QR code from the official wallet screen.
2 Falling for Address Poisoning
Address poisoning is a scam where attackers place a lookalike address in your transaction history. The goal is to make you copy the wrong address later.
This scam works because many people copy wallet addresses from recent activity instead of from the original source. I never copy a receiving address from transaction history. I go back to the wallet, exchange, or contact that gave me the address in the first place.
3 Skipping a Small Test Transaction
A small test transaction can feel annoying because it costs time and fees. For larger amounts, that small test can save you from a serious mistake.
I do not use test transactions for every tiny swap. For a meaningful amount, I see a test transaction as cheap insurance.
Ignoring Gas Fees Before Swapping
1 Swapping Small Amounts During High Fees
Gas fees are the network costs needed to process a transaction. On busy networks, these fees can rise quickly.
Beginners often notice the token price but miss the network fee. That creates a bad trade where the fee eats too much of the swap. If you are swapping a small amount and the gas fee takes a large share of it, waiting can be smarter.
2 Forgetting That Failed Transactions Can Still Cost Gas
A failed swap can still cost gas because the network still processed the transaction attempt. That surprises many beginners.
This usually happens when the transaction runs out of gas, the price moves too much, or the swap settings are wrong. Before confirming, I check the estimated fee, the token amount, and the warning messages from the wallet.
3 Ignoring Network Timing
Crypto markets run all day, yet network fees do not stay the same all day. During busy periods, swaps can become more expensive.
If the swap is not urgent, I usually wait when gas looks unusually high. Patience can make a real difference, especially for smaller wallets.
Setting Slippage Too High or Too Low
1 Accepting a Worse Price Than Expected
Slippage means the final swap price can be different from the price shown before confirmation. This happens more often when markets move fast or when a token has low liquidity.
Beginners often click the recommended setting without understanding the result. A high slippage setting can let the swap go through at a much worse price.
2 Making Slippage Too Tight
Very low slippage can also create problems. The swap may keep failing if the price moves even a little before the transaction confirms.
That does not mean beginners should set slippage high by default. The better approach is to understand why the app suggests a certain range, then stay careful with risky or thinly traded tokens.
3 Using High Slippage on Low-Liquidity Tokens
Low-liquidity tokens can move sharply from one trade. If you use high slippage on those tokens, you may receive far less than expected.
I get extra cautious when a swap app shows a large price impact. That warning tells me my trade may move the market, and beginners should never ignore it.
Not Checking Price Impact
1 Swapping More Than the Pool Can Handle
Price impact shows how much your own swap may change the price. This matters most on decentralized exchanges where trades happen through liquidity pools.
If the pool is small, even a normal-sized trade can push the price against you. The swap may complete, yet the final result can feel terrible.
2 Trusting the Quote Without Reading the Details
The first quote is only part of the story. The swap screen may also show minimum received, route, fee, price impact, and warnings.
Beginners often look only at the big number. I look at the minimum received because that number tells me what I could actually get if the trade executes under the current settings.
3 Swapping During Heavy Volatility
Volatile markets make price impact and slippage more dangerous. When a token is moving quickly, the quote can become outdated before the transaction confirms.
For beginners, slower decision-making helps. A swap should feel checked, not rushed.
Approving Unsafe Token Permissions
1 Clicking Approve Without Reading
Many swaps require a token approval before the actual swap. That approval lets a smart contract access a token in your wallet.
The mistake comes from clicking approve without reading what permission you are giving. If the site is fake or the contract is unsafe, that approval can put funds at risk.
2 Giving Unlimited Spending Permission
Some apps ask for unlimited permission so future swaps feel easier. That can be convenient, yet convenience adds risk.
For tokens I do not use often, I prefer setting a custom spending limit when the wallet allows it. I also review old approvals from time to time and revoke permissions I no longer need.
3 Approving on Fake Swap Pages
Fake swap pages can look almost identical to real ones. Scammers use ads, social posts, direct messages, and fake support accounts to push these links.
I never connect my wallet from a random message. I type the known website address myself or use a saved bookmark.
Skipping the Final Safety Check
| Check | What to Look For | Why It Matters |
|---|---|---|
| Token | Correct contract address | Fake tokens can copy names and logos |
| Network | Correct chain selected | Wrong networks can make funds hard to recover |
| Address | First, middle, and last characters match | Lookalike addresses can trick users |
| Gas fee | Fee makes sense for the swap size | High fees can ruin small swaps |
| Slippage | Setting matches the token risk | High slippage can lead to a worse price |
| Price impact | Low enough to accept | Large trades can move the pool price |
| Approval | Permission amount and contract | Unsafe approvals can expose wallet funds |
My Beginner Swap Checklist
- Open the swap site from a bookmark or official source.
- Confirm the token contract address before selecting the token.
- Check the blockchain network before sending or swapping.
- Compare the wallet address carefully, including the first, middle, and last characters.
- Review gas fees and avoid swaps where the fee is too large compared with the trade.
- Check slippage, minimum received, and price impact.
- Use a small test transaction for larger amounts.
- Revoke old token approvals that you no longer use.
Final Thought
Crypto swapping gives users a lot of freedom, and that freedom rewards careful habits. I like swaps because they are fast and open, yet I treat every confirmation screen like a security checkpoint.
Most beginner mistakes are avoidable. Slow down, check the token, check the network, check the address, and read the approval request before clicking confirm.